How to Cover a Lampshade
If you’ve ever thought to yourself, “How do I cover a lampshade in a different fabric” then let me tell you, this is the article for you!
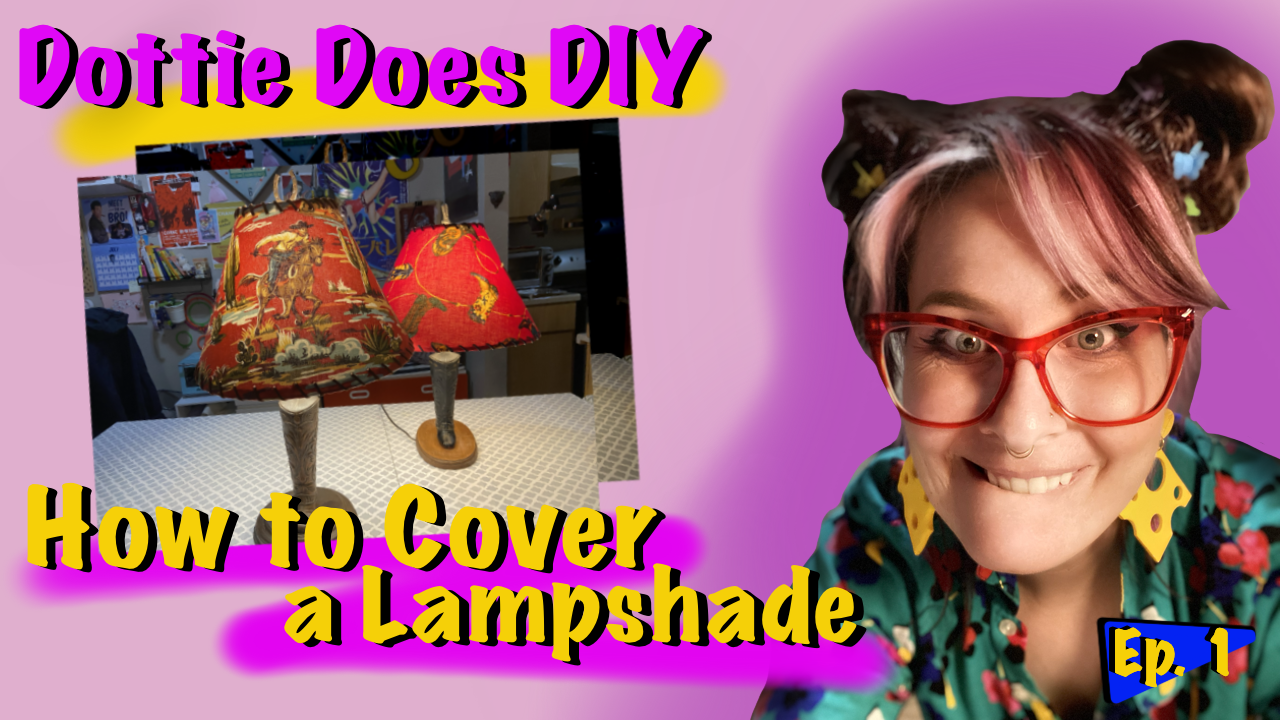
A few months ago I scored the most dreamy set of cowboy boot lamps at an estate sale. The only issue separating me from the perfect home-on-the-range decor? One was missing a lampshade!
Well “I’m crafty enough,” I thought to myself, “I’ll just make one!” Like all good projects, it sat unfinished in my craft room for the next several weeks. UNTIL NOW!
With a minimal amount of research and a trip to the hardware store, I was on a roll! I ordered my ideal cow-poke print fabric off of the cutest small business on Etsy and it was off to the rodeo!
Want to make your own? I suspect that’s why you’re here so I’ll get right to it!
Materials you will need
Most of the items you will need are available at your local hardware store or craft store.
As I mentioned I found the fabric I wanted online. There are so many amazing small businesses selling unique fabric prints on Etsy, but if you want it now, now, now! Then look no further than your local fabric store.
You will need:
- Upholstery fabric (about a yard should do you)
- Spray adhesive (I like Gorilla Glue)
- A sharpie or other fat felt tip marker
- A blank lampshade
- Butcher paper
- Scissors
- Optional leather cord
And that’s it!
Keep in mind: when choosing your fabric (depending on the shape of your shade) a directional fabric won’t come out totally straight so you might be better off with an all-over print.
Making a Pattern
Got all your stuff? Now it’s time for the fun part! Just kidding we all know shopping for the fabric was the fun part, but this part is pretty good too!
We’re going to be rolling the lampshade along with the butcher paper from the seam all the way around until we meet the same seam again. Go ahead and eyeball this once or twice to make sure your paper is wide enough. I had to double up two pieces since the slant of my shade made this almost a round pattern.
Once you’ve got your butcher paper laid out you’re going to place your shade seam down on the edge of the paper making sure the shade has enough clearance to roll all the way around. Mark the seam top and bottom with your marker. Then slowly start rolling your shade making a small dash along the bottom of the shade on the butcher paper with each movement until you have rolled the shade all the way over to reach the seam once again.
Now you’re going to go back to the beginning lining up the seam with your original marking. This time you will be marking along the top of the shade as you repeat the process.
When you’ve finished this step it’s good to go back and roll the shade along one more time to make sure everything lines up. When you’re sure it does go ahead and add a seam allowance of about half an inch on top and bottom of the pattern.
Make sure you leave an extra inch of seam allowance at the end seam so that you have room to fold over a nice clean seam on the outside of your finished shade.
TLDR? If you’re anything like me you’d rather watch a YouTube video… So I made one of those too!
Cut out your Paper Pattern
As we all know the old saying goes: measure twice and cut once. Here you’re going to cut out your paper pattern and wrap it gently around your lampshade to make sure everything is covered.
This is a fairly forgiving process but you can’t make more fabric where there is none so make sure it fits at this stage.
Once you’re sure you’re happy with the fit, go ahead and cut out your fabric. If you’ve chosen a directional fabric make sure to find a good center point on your pattern before you start to cut.
Putting it All Together
This is it, the big move! You’ve got your fabric and your lampshade, now it’s time to put it all together. The most important part: take your time.
Once you’ve prepared your workspace, (layout another sheet of butcher paper to make sure you don’t get adhesive everywhere) you’re ready to spray!
Smooth out your fabric and give it a nice even coating of spray adhesive. I recommend doing this part outside so you don’t get any overspray on your craft surface. But no matter where you decide to do it make sure you follow the safety instructions on the can.
Once you’ve sprayed your fabric, fold down the hemmed edge to make a nice seam and spray the underside as well. Wait a minute or so for the adhesive to get tacky like a piece of tape.
Once it’s feeling sticky, line up the seam on your lampshade to the raw edge of your fabric and start rolling your shade along with your fabric.
Make sure to take your time here. Smooth the fabric down as you go to ensure you don’t get any air bubbles and backtrack if you need to. The spray adhesive is super forgiving and gives you a decent amount of time to get it all on there. (But not like forever so, you know, take your time but keep it moving lol)
Once this is done and your hem is smoothed down in place, start working around the top and bottom edges of the shade. Work little by little here and you shouldn’t have any problem getting a smooth finish along the edge. If you find you have left too much fabric simply trim it off and keep on sticking.
And there you go! You now have a beautiful and finished lampshade. The next step is optional so feel free to skip it.
Optional Details
Now that we’re done with the lampshade, let’s make it fancy! Since I’m going with a western theme (and because the shade I’m matching has the same) I’m going with a whip stitch of leather cord all around the edge.
For this step, I simply took my awl and punched holes every 1 ½” or so all around the top and bottom edge of the lamp. (My cording was a little thick so I ended up pushing a small paintbrush handle through to make the hole a little bigger.)
Once your holes are in place simply thread the cord in from the outside, then back over the top and in again creating a whip stitch all around the edge. Make sure you leave a few inches on each end so that you can tie it off.
If you would like to add a fringe or a braided cord instead simply measure your shade around and glue your trim into place using fabric glue and clips to hold it into place until dry. I recommend glue as opposed to a stitch in this case as the needle will create unwanted holes in your shade.
You did it!
And that’s it, you did it! If I had known how easy it was to make custom lampshades I would have started years ago.
This is such a fun project to spice up your own decor or to make amazing one-of-a-kind gifts for friends. I hope you’ve had so much fun making your own shade, if you have any questions please feel free to leave them below. And if you try this project, I would love to see what you come up with! Tag me in your lamp pictures on Instagram @DottieVisionDIY and let me know how it went for you!
I do hope you enjoyed this project, thanks for reading, and until next time, happy crafting!

