Let’s Make a No-Sew Tee Shirt Tote
Have you ever thought to yourself, “I really want a new tote, only slightly wonky”? Well, have I got a project for you!
The no-sew tee shirt tote is everything you didn’t know you wanted in a craft project. It’s got tee shirts, it’s got strip cutting, it’s got upcycling, it’s got knot tying! While this project could probably take five minutes using a sewing machine, that would really defeat the purpose.
Come on, where’s your sense of adventure?! This is also a super fun project to do with children if you’ve got those or while you make up songs alone in your apartment. You do you! Anyhow, enough yammering. Let’s get into it!
TLDR? You can always watch the unhinged version on Tiktok instead!
Craft Supplies (Excuses to Buy Them)
This project could not be easier, as evidenced by this supply list. A few of the items listed here are optional, but they’ll make your life a bit easier.

- A Tee Shirt you’d like to upcycle
- Scissors sharp enough to cut the shirt without making you go crazy.
Optional:
- Chalk a highlighter, a bar of hotel soap, or anything you’d like to use to mark your cuts.
- A Ruler to make a straight line at the bottom of the bag. You can eyeball this too.
That’s it! Simple supplies for a simple craft, let’s make it!
How To Do The Thing
I like to do this first part with the design on the outside to make sure I don’t cut into the picture and ruin my fabulous tote. But as always, you do you, get crazy, make mistakes, and remember, you can’t ruin something you didn’t like to begin with.
Let’s upcycle!
Strap City – Step One
The first thing we’re gonna do is cut the straps of the bag. These will be made from the sleeve and neck holes. If you’ve ever made a tee shirt into a tank top, then you’re already an expert!
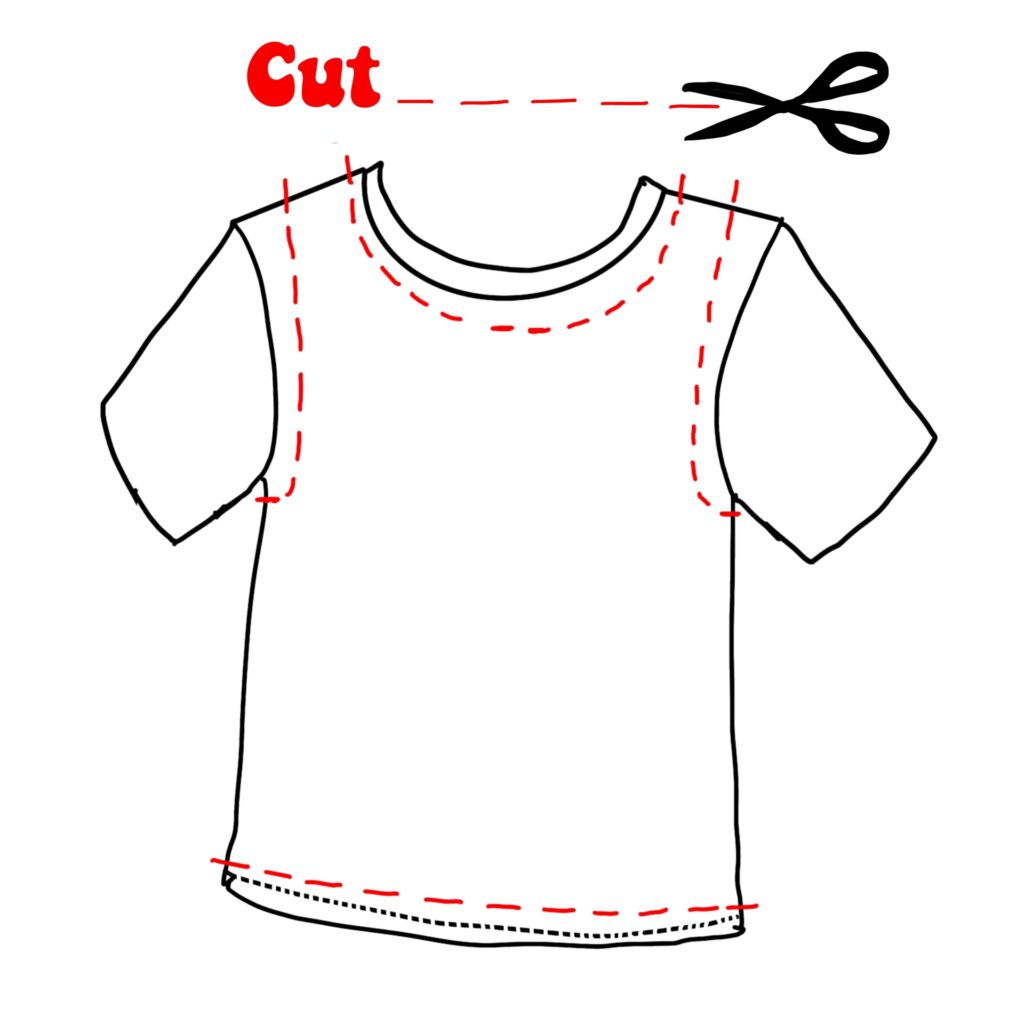
Mark the sleeves and neck, making a “J” shape from the armpit to the shoulder and a “U” at the neckline. These will be the straps and opening of your bag. (If you’ve decided to skip this step, eyeball it, and jump right to cutting.)
Cut out the sleeves from just below the armpit seam to the shoulder, coming up as straight as possible. Try to make them even, but let’s be real, it doesn’t have to be perfect. Nothing does!
Then go ahead and cut out the neckline to make the opening for your bag. Deep enough to make it look like a bag but mind your design. You don’t want to cut off the fun part! Unless you do, then do that.
Bottom Of The Baggie – Step Two
This will create the bottom of the bag. We will have a little fringe anyway you slice it, so decide at this point if you’d like your bag to have a zazzy fringe on the outside.
Inside Fringe: Turn your shirt inside out for this next phase.
Outside Fringe: Leave your shirt right-side out. If you would like to make your shirt even fancier, you can cut the strips in the next step a little longer to have room for beads. If you want, but who wouldn’t? Everybody loves beads.
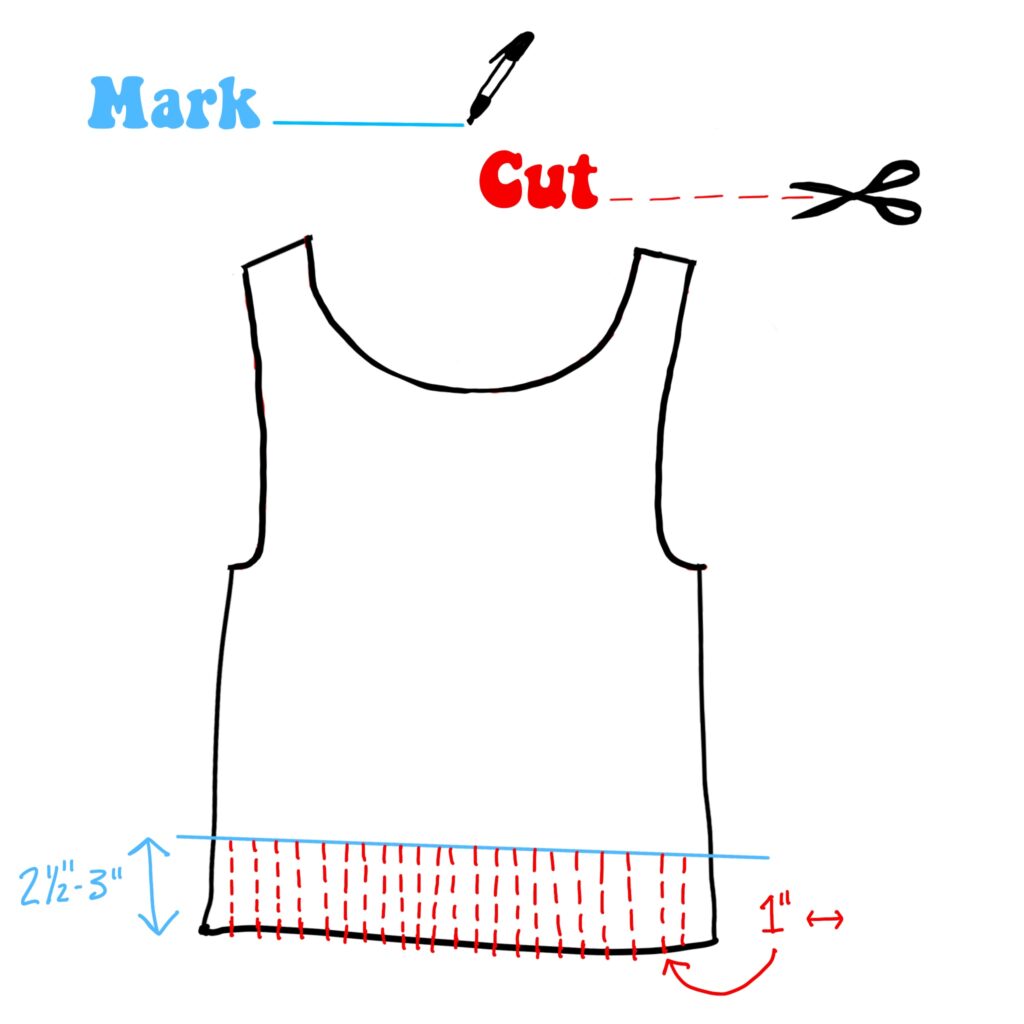
Mark the bottom in a straight line 2.5” or 3” up from the seam. Mark them a little longer if you want beads. If you’ve chosen not to mark, just eyeball it.
Cut off the bottom seam on the tee-shirt.
Then make 1” slits about 2.5” (longer for beads) up to the line you marked across the bottom of the shirt. These will be your ties. The more even they are in size, the easier the next part will be.
Everybody Loves Knots! – Step Three
You’ve made it to step 3, the most tedious step. Congratulations! Don’t worry. It’s super easy. Let’s do it.
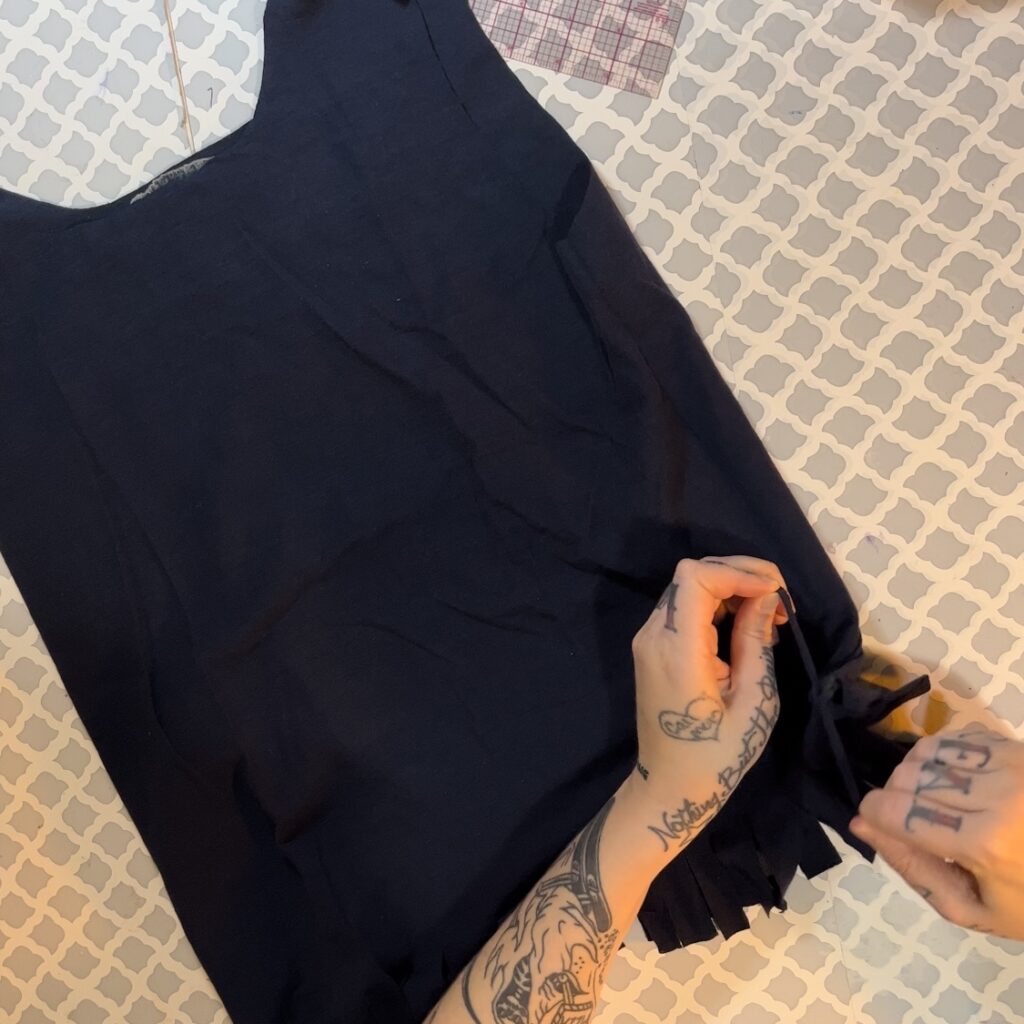
Tie the little strips together in a lil’ double knot. You will go across the shirt, tying the ribbons in knots until you reach the other side.
Once you get to the other side, stretch your shirt a bit to spread the knots out again. Don’t pull too hard, or you might rip the bag.
Now you’re going to do it again! This time take one strip from the first knot and one from the knot next to it and tie them together. This will close all the tiny little holes at the bottom of the bag.
Guess what? You’re done! If you’d like to add beads, go crazy!
If you’re skipping the beads – it’s ok. Some people just can’t handle the extra zazz. We won’t hold it against you – go ahead and flip the bag right side out now.
That’s it, you did it!
Welcome To Bag City – Population You!
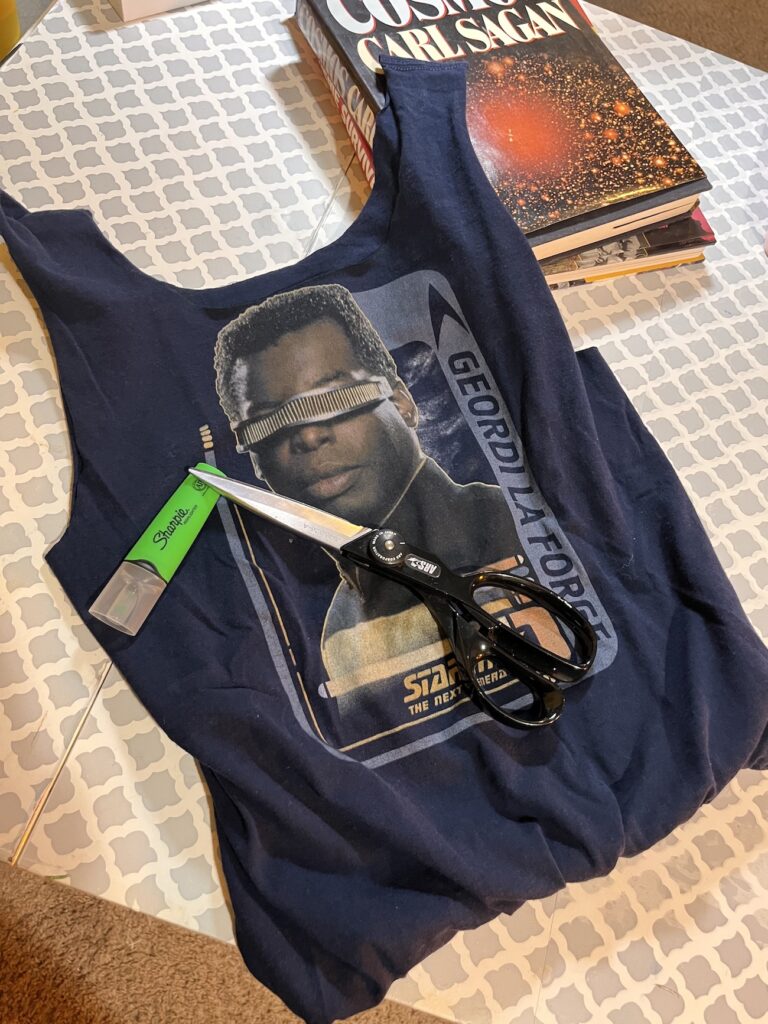
Do you feel cool and accomplished? Because you totally should!
This might be an easy craft that most people could do, but you did it, and that’s pretty rad. I love finishing things! This is a super fun craft for travel, camp, or entertaining children so you can enjoy a moment of peace while they tie a thousand tiny knots.
Now, get out there and show off your bag! I want to see it. Tag me in your bags, @dottievision I can’t wait to see what you create.
What’s Up, Buttercup?
Want to tell me what you thought of this craft, have a fun idea for a craft, or want to see me make something specific? Drop a comment below. I’d love to hear from you.
